Adorable Origami Doll House - using papers and colors
This is a great rainy afternoon project that will engage children in the making, decorating and playing. It's fast to make, fun to decorate and it will fold away flat so you won't have to find space for storage. Let's get started.
Supplies
Lightweight card 50cm (20 inches) square.
Coloured markers.
Glue or double-sided tape (optional).
1.Cut the Card
Step 1
Choose card that is sturdy but is lightweight enough to be folded. The card can be any size you like, although if it's too much larger than 50cm (20 inches) square, it may not be sturdy enough to stand up. Using this size card, the finished doll house will be about 26cm (10 inches) tall x 26cm (10 inches) wide.
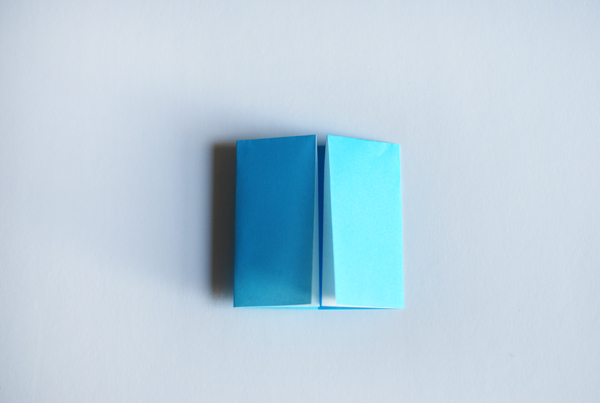
2.Fold the House
In order to show the folds, I have used a small piece of paper.
Step 1
Fold the paper in half horizontally.
Step 2
Fold in half again.
Step 3
Open.
Step 4
Fold the left side in to meet the centre fold.
Step 5
Fold the right side in to meet the centre fold.
Step 6
Open the left side and place your finger between the two layers of paper. Crease the fold flat.
Step 7
Fold the top and press flat.
Step 8
Repeat on the right side.
Step 9
Turn the paper over.
Step 10
Fold the left side over.
Step 11
Fold the right side over.
Step 12
Stand the house up and make sure the sides of the house are sitting at right angles to the inside wall. If the two side walls aren't sitting together (see the gap down the centre, between the walls), glue them together.
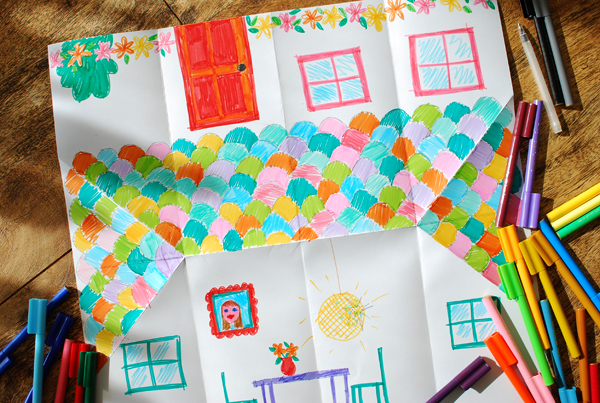
3.Decorate the House
Now this is the fun part for the kids. Open the house flat again and draw on the roof, windows and doors - and anything else you'd like to add. Our house ended up with a mirror ball in the dining room! One side of the house can be the exterior and the other side the interior.
Start by drawing the outlines and then colour in, that way you'll know where everything is meant to go.
4.Reassemble the House and Play
I hope you've enjoyed learning how to make this easy origami doll house. It's a really fun project to make with children, who can be involved in all steps of the making process.
A doll house is brilliant for imaginative play, and your child can personalise the house to suit their mood - and figurines! You could also make a space station house, a farm house or a shop.
Did you enjoy this project? Would you like to see more craft ideas to make with kids? Let us know in the comments section below.


No comments:
Post a Comment